Pole Barn Site Prep: How to Build a Solid Building Pad
Planning a pole barn? Learn how to grade, level, and build a proper fill pad so your barn stays dry, stable, and trouble-free for decades.
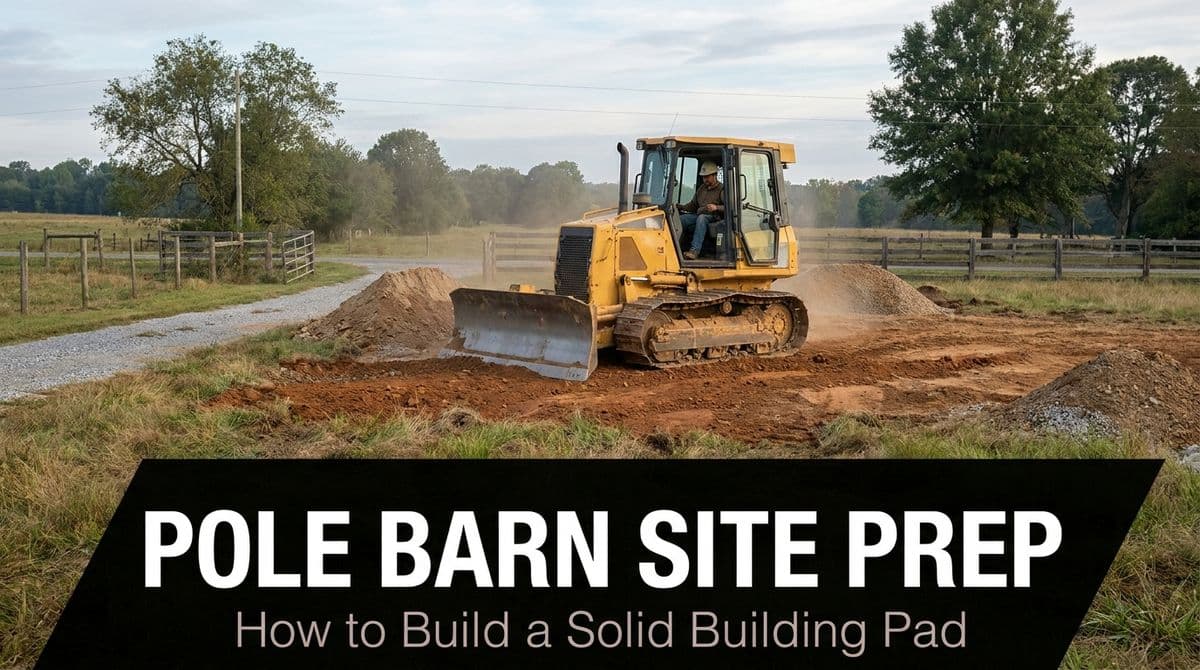
Planning a Safe, Long-Lasting Pole Barn Pad
We recently got a call from a homeowner — let’s call her Lisa — who is planning a new 40' x 60' pole barn on her property. Her site was an open grass area that sloped downhill, and she knew she’d need some dirt work and fill brought in to level things out. She had already started talking with the county and a pole barn company, and her head was spinning with details.
We hear that a lot. A pole barn is a big investment, and the site prep can make or break how long it lasts and how well it performs. So we told Lisa the same thing we tell all our customers: if you get the building pad right — grading, elevation, and fill — you’re setting yourself up for decades of trouble-free use.
In this post, we’ll walk you through how we approach preparing a pad for a new pole barn so you can understand the process, whether you’re doing some of it yourself or hiring a pro.
Step 1: Evaluate the Site and the Slope
With Lisa’s project, the first thing we wanted to know was exactly what she told us on the phone: the size of the barn (40' x 60') and the current conditions (open grass, slight downhill slope, maybe a tree or two nearby).
Whenever we look at a new pole barn site, we start with a simple checklist:
- Is it open or wooded? Trees and stumps mean grubbing and extra excavation.
- How much slope is there? A slight slope may need only light grading; a steeper slope usually needs more fill and possibly a small cut on the high side.
- What’s growing there now? Grass, brush, or crops tell us how much topsoil and organic material we’ll need to strip.
- Any nearby trees or structures? Like Lisa’s leaning tree, anything close to the building footprint may need to be removed for safety and to protect the building.
Even if your site looks “pretty flat,” it’s worth taking a level, laser, or at least a string line and measuring how much drop there really is across the footprint. A couple of inches is one thing; a foot or more across 40–60 feet will definitely affect how much fill you’ll need.
Step 2: Establish the Building Height and Drainage
Before we ever move dirt, we like to talk with the customer and their barn builder (if they’ve chosen one) about finished floor elevation. In plain language: how high do we want this pad compared to the surrounding ground and driveway?
We usually recommend setting the pad high enough that water naturally sheds away from the building on all sides. For most sites, that means the pad is several inches to a foot or more above the natural grade at the low side, with a gentle slope away from the building.
What Happens When Drainage Is Wrong
We’ve seen the headaches that come from pads set too low or graded flat:
- Standing water along the sides or at the doors after rain, which seeps into the building and promotes rust and rot.
- Mud at overhead and walk doors so every trip in or out tracks dirt and water onto your concrete slab or stored equipment.
- Frost heave issues in colder climates, where water-soaked soils freeze and lift parts of the slab, leading to cracks or doors that don’t open smoothly.
- Soft, spongy ground around the barn that never really firms up because water has nowhere to go.
By setting the pad slightly higher than the surrounding grade and giving the ground around it a gentle slope away from the building, we create a simple, passive drainage system. Water runs away instead of toward the posts and walls, which helps protect your investment for the long haul.
Step 3: Strip Topsoil and Organic Material
Once we’ve agreed on the pad height and layout, we strip off the topsoil — the dark, organic-rich layer that’s great for lawns and gardens but terrible for building pads.
Topsoil and roots continue to break down over time, which means they settle. If you build directly on topsoil, you’re almost guaranteed to end up with low spots, cracking slabs, or posts that shift. That’s why we always:
- Remove grass, roots, and topsoil from at least the full building footprint
- Often strip an extra 2–4 feet beyond the footprint for working room and drainage
- Stockpile that topsoil on site to reuse later for landscaping around the barn
Step 4: Build Up the Pad With Proper Fill
In Lisa’s case, the site sloped downhill, so she knew we’d have to bring in fill to level it. That’s common, and it’s usually where costs can swing up or down depending on how much material is needed and what type of fill you choose.
Choosing the Right Fill Material
For a pole barn pad, we almost always recommend a granular, compactable material like:
- Sand or sandy gravel (often called “fill sand” or “pit run,” depending on your area)
- Class 5 or similar crushed gravel for the top layer
- Occasionally clay fill on the bottom lifts, but only if it can be well compacted and capped with granular material
If you’re sourcing fill yourself, there are a few simple checks you can do:
- Ask the supplier what the material is called and what it’s typically used for (driveways, pads, backfill, etc.).
- Grab a handful: if it’s very dark, full of roots, and smells “earthy,” it’s more like topsoil than structural fill.
- Do a quick squeeze test: dampen a small handful and squeeze it; it should hold together but break apart when poked, not turn to soupy mud.
Good fill, placed in layers and compacted, gives your barn a solid, stable base that handles vehicle traffic, heavy equipment, and seasonal moisture changes.
Placing and Compacting Fill
We bring in fill, spread it in lifts (layers), and compact each lift before adding the next. Depending on the material and equipment, lifts are typically 4–8 inches thick. This step is critical — thick, uncompacted layers will settle later, and you’ll see it in the building.
For most barn pads, we like to build the fill at least 2–4 feet beyond the building footprint in all directions. That extra shoulder gives the posts and slab a firm edge and helps with drainage and access around the building.
Step 5: Fine Grading and Final Slope
Once the pad is at the right elevation, we perform a fine grade. That’s where we smooth and shape the top surface to match the barn builder’s specs and the drainage plan.
We typically:
- Ensure the pad is level across the footprint where the posts or slab will go
- Create a slight crown or flat surface within the pad, depending on the design
- Grade the surrounding ground to fall away from the barn on all sides
At this point, we like to walk the homeowner around the pad and point out how water will move, where driveways or approaches might tie in, and how the pad lines up with existing buildings or features.
Common Mistakes We See With DIY Pads
We absolutely understand the urge to save money by doing some or all of the dirt work yourself. We work with plenty of DIY-minded customers. But there are a few mistakes we see over and over:
- Not stripping topsoil: Building right on grass or dark soil leads to long-term settling. Always remove that organic layer first.
- Skipping compaction: Just dumping and smoothing fill with a skid steer isn’t enough. Use a plate compactor, roller, or hire someone with the right equipment to get proper compaction.
- Setting the pad too low: It may look fine on a dry day, but after a heavy rain or spring melt, water will run toward the barn instead of away from it. Aim for the pad to be clearly above surrounding low spots.
- Not extending the pad beyond the building: If your fill ends exactly at the building line, you’ll end up with steep edges that erode and poor support at doorways and post locations.
If you’re doing a DIY pad, take your time on these points. A little extra effort now is much cheaper than fixing drainage or settling problems after the barn is built.
When to Bring in a Professional
For a smaller shed, a handy homeowner with some equipment can often handle the prep. But for a full-size pole barn like Lisa’s 40' x 60', it usually makes sense to have an experienced dirt work contractor at least help with planning and elevations, if not the entire build.
When you’re talking with potential site prep contractors, we suggest asking questions like:
- How many pole barn or building pads have you done?
- What equipment do you use for stripping, filling, and compacting?
- How do you verify elevation? (Laser level, GPS, string lines?)
- How do you verify compaction? (Number of passes, specific equipment, or testing if required?)
- Will you coordinate with my barn builder on pad height and layout?
- How far beyond the building footprint do you typically extend the pad?
We like to be involved early, just like we were with Lisa, so we can coordinate with the county requirements and the barn builder. That way, everyone’s on the same page regarding pad size, height, and timing.
Bringing It All Together
Planning a pole barn means juggling permits, builders, financing, and design decisions — site prep is just one more piece of the puzzle, but it’s a critical one. By evaluating the slope, setting the right elevation, stripping topsoil, using quality fill, and paying attention to drainage, you end up with a building pad that supports your barn for decades.
If you’re in the early stages like Lisa and trying to figure out what you need for grading, leveling, and fill dirt, we’re happy to come out, take a look, and talk through options with you. Getting the ground right is the first step toward a safe, long-lasting pole barn you’ll be proud of.